This information was sent in from our good friend and IPY Dealer, Norm Pierce who owns Pierce Yacht Company in Boothbay Maine. Thank you NORM, we really appreciate your help and all you support.
copy below
PIERCE YACHT COMPANY, INC.
PO Box 236 Boothbay Harbor, Maine 04538
Office Phone: 207-633-2902
Web Site:
www.pierceyacht.com
BALMAR 60 SERIES ALTERNATOR ALIGNMENT
Alternator belt failure seems to have several causes, with alternator alignment and tension
being the most common, however rust on the crankshaft / drive sheave is not uncommon in
older boats. Hopefully the following will be of help.
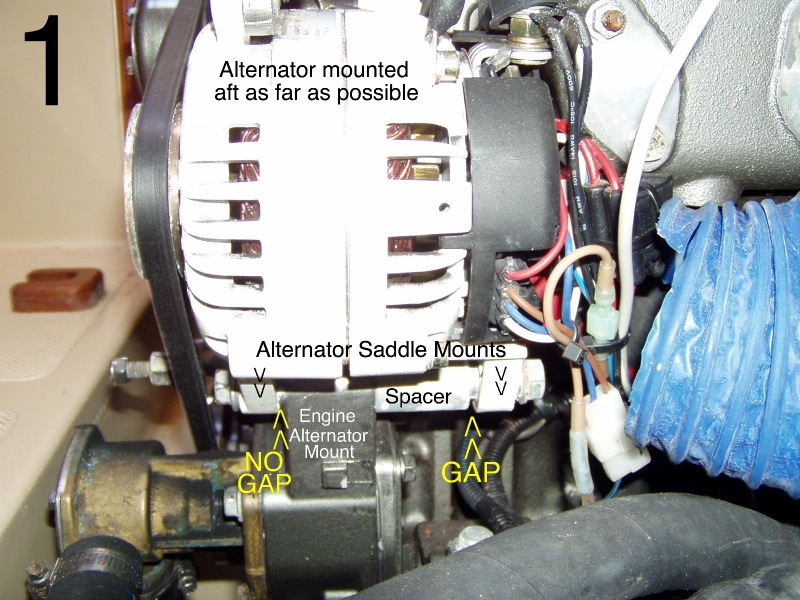
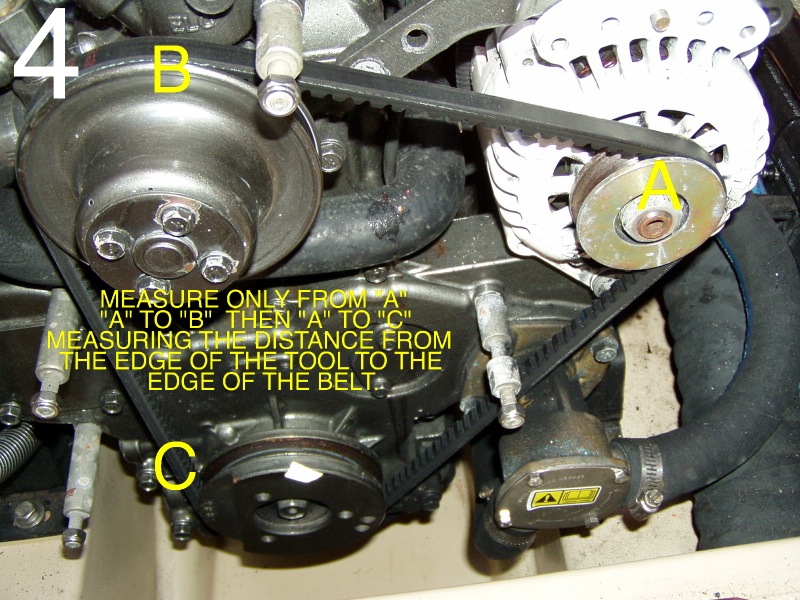
First one should have a means of measuring. For several years we have used and supplied
our customers with a 15” long piece of ¼” thick, 1” wide, piece of aluminum bar stock available
at most hardware stores. It is necessary to be able to see what the eye cannot.
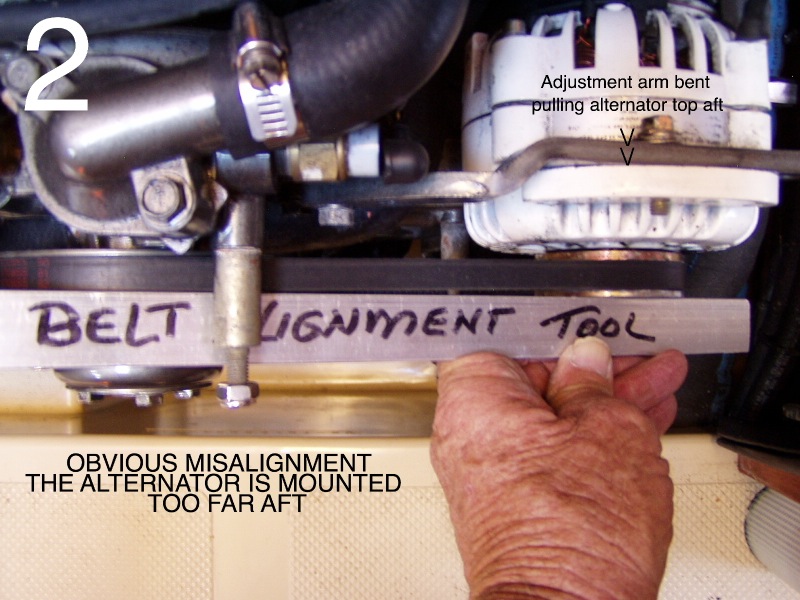
The belt travels around three sheaves, two of which are fixed and cannot be changed, so it is
the alternator that has to be aligned to the other two. For the older engines there has been
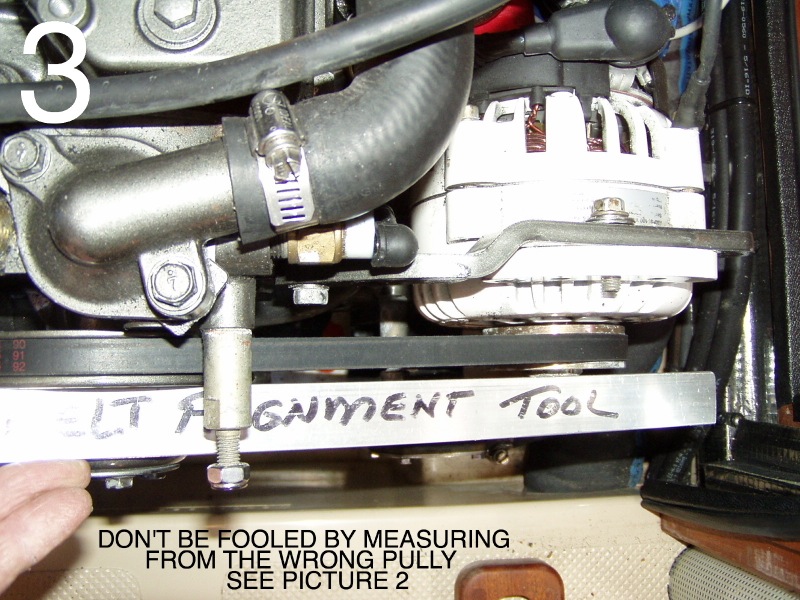
enough slack or play in the engine alternator mounting boss to do a reasonable job by twisting
the alternator side to side, up or down to achieve alignment. With newer engines and the
sliding aft alternator mount this becomes more difficult. As you view the attached pictures the
following procedure becomes more apparent. Hope the following will be of some help.
Note: What is referred to as a “Jam Bolt” may or may not be what it was designed to do, but it
effectively does the job to a point, but is easily overpowered by the “Pivot Bolt” without
washers or a spacer behind the front pivot mount.
The procedure:
1. Use the “alignment tool” to predetermine the change and amount of change that has to
be made to achieve alignment.
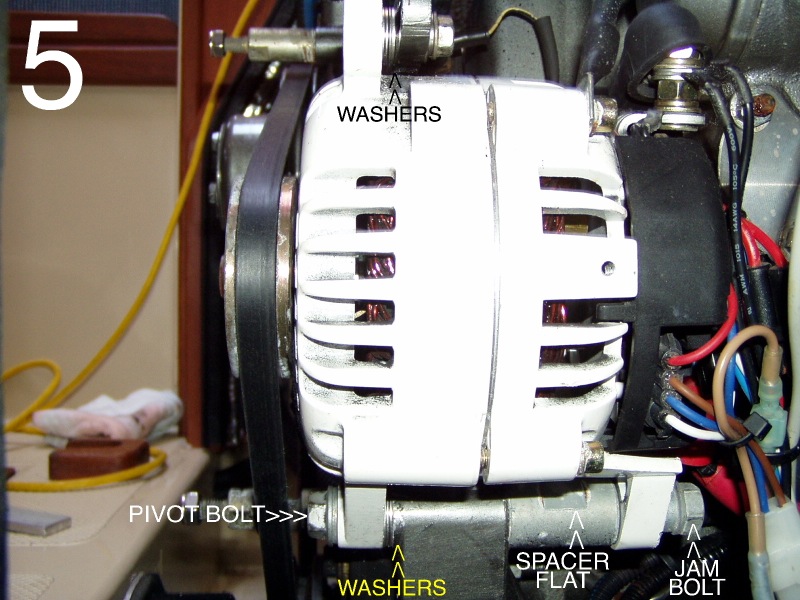
2. Holding the “Spacer” by its flats loosen the “Jam Bolt”, then loosen the “Pivot Bolt” and
“Adjustment Arm Bolt” enough to move the Alternator Fore or Aft enough to achieve
approximate alignment.
3. Determine how many and what size washers are needed to achieve the corrected
position when all three bolts are tightened. (Do not tighten yet !) Using thinner washers
will make it easier to get a closer alignment.
Be aware that the “Jam Bolt” in the aft alternator mount goes through a split sleeve that
expands to hold the aligned position with no “Play” in the aft mount, however, without
washers at the front mount you can easily over power the jam and pull the alternator aft
out of alignment as you tighten the “Pivot Bolt”.
4. Place a cloth rag under the alternator to catch the washers you will drop while inserting
them between the Engine Mount and the front Alternator Mount, and between the
Adjustment Arm and the top of the alternator.
5. After inserting the predetermined number of washers lightly tighten the “Pivot Bolt”, then
tighten the “Adjustment Bolt” to achieve correct belt tension, then fully tighten the “Pivot
Bolt”, then the “Jam Bolt”
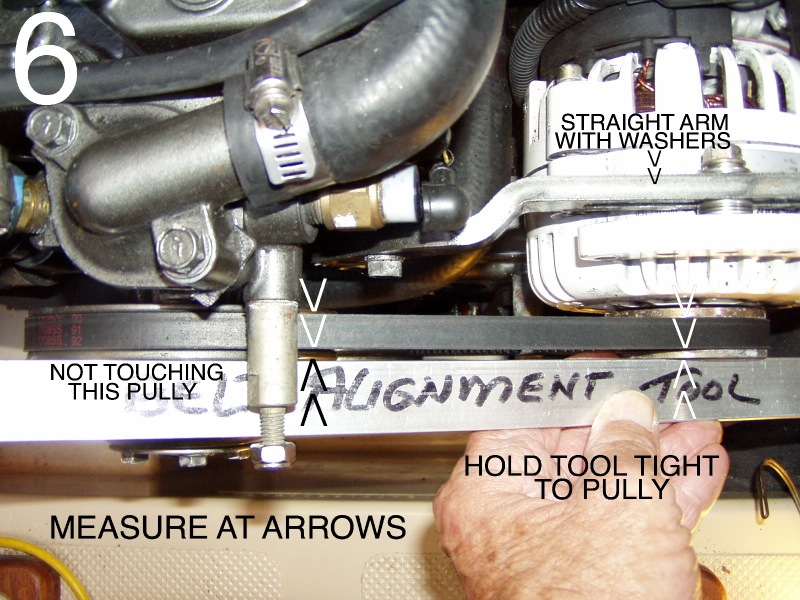
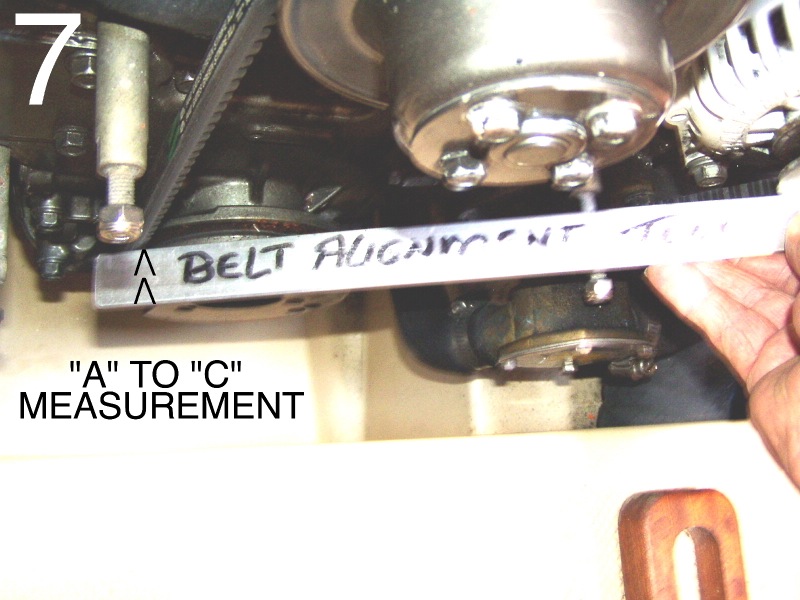
6. Check alignment with the Alignment Tool by holding it tight to the alternator sheave and
measuring the distance between the tool and the belt at each position “A” to “B” then “A”
to “C” and add or subtract washers to achieve alignment as close as possible.
7. Check belt tension every time you check the oil and adjust as necessary.
Here is Norm's PDF of this process.
File Attachment:
File Name:
Balmar.pdf
File Size:71 KB