Rebedding chainplates
Visibility Public
Finally had a couple of days without rain and could rebed the chainplates. It took me about 1 hour each. The sun is so hot here that you have to drink lots of water and cool off occasionally.
I took the stay/shrould off and removed the covers to allow top access.
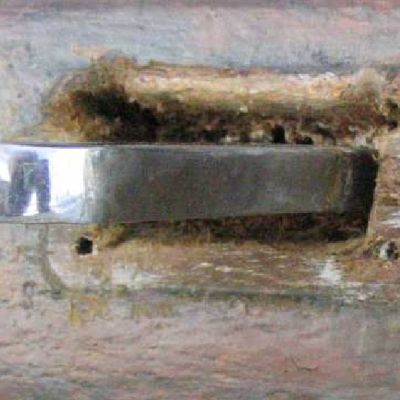
I had to cut wood out to make a large enough gap around the chainplate to put caulk in on over half of them. The 5200 sticks very well to the wood and not at all to the metal. I used a sharp knife to cut the 5200 away from the wood and a wood chisel to enlarge the hole. Then a small bladed screw driver to pry out the debris and sometimes a needlenose pliers to pull stuff out with. Taped off the area and filled it with the GE Silicon. Used a pointed stick to push the silicon down to into the gap and then squeezed in more silicon. Put the cover back on lightly, removed the tape, replaced the screws in the cover and tightened, attached the stay/shroud and tightened it.
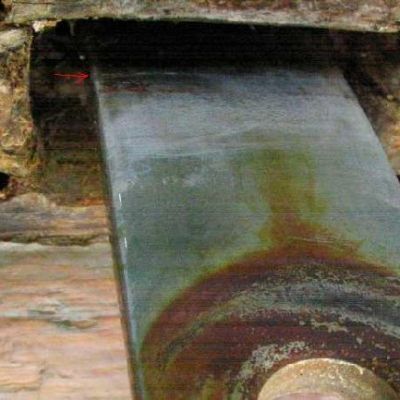
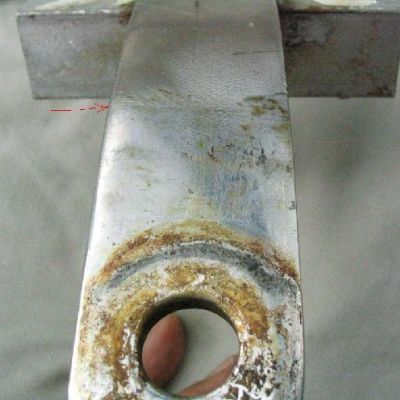
I had a scare on the stdb lower aft chainplate when I had removed most of the 5200. There was a scratch/crack running all the way across it just below the level of the top of 5200 on the outboard side. I had the man from the metal working shop take a look and he thought it was just a scratch. Later I saw the same type of scratch on four other chainplates in approximatedly the same location. Could it that be IPY puts those scratches in??? I thought that I had done it with my knife so I was careful on one to not touch the chainplate when I cut out the 5200 and it had that same scratch.
Norm
s/v Realtime